GETTING STARTED
1. Installing the Saladil WP Plugin
Download, install and activate the WordPress plugin on your website
The process of installing Saladil is extremely easy.
Once you have created your account on saladil.com, you must proceed to install the WordPress plugin on your site.
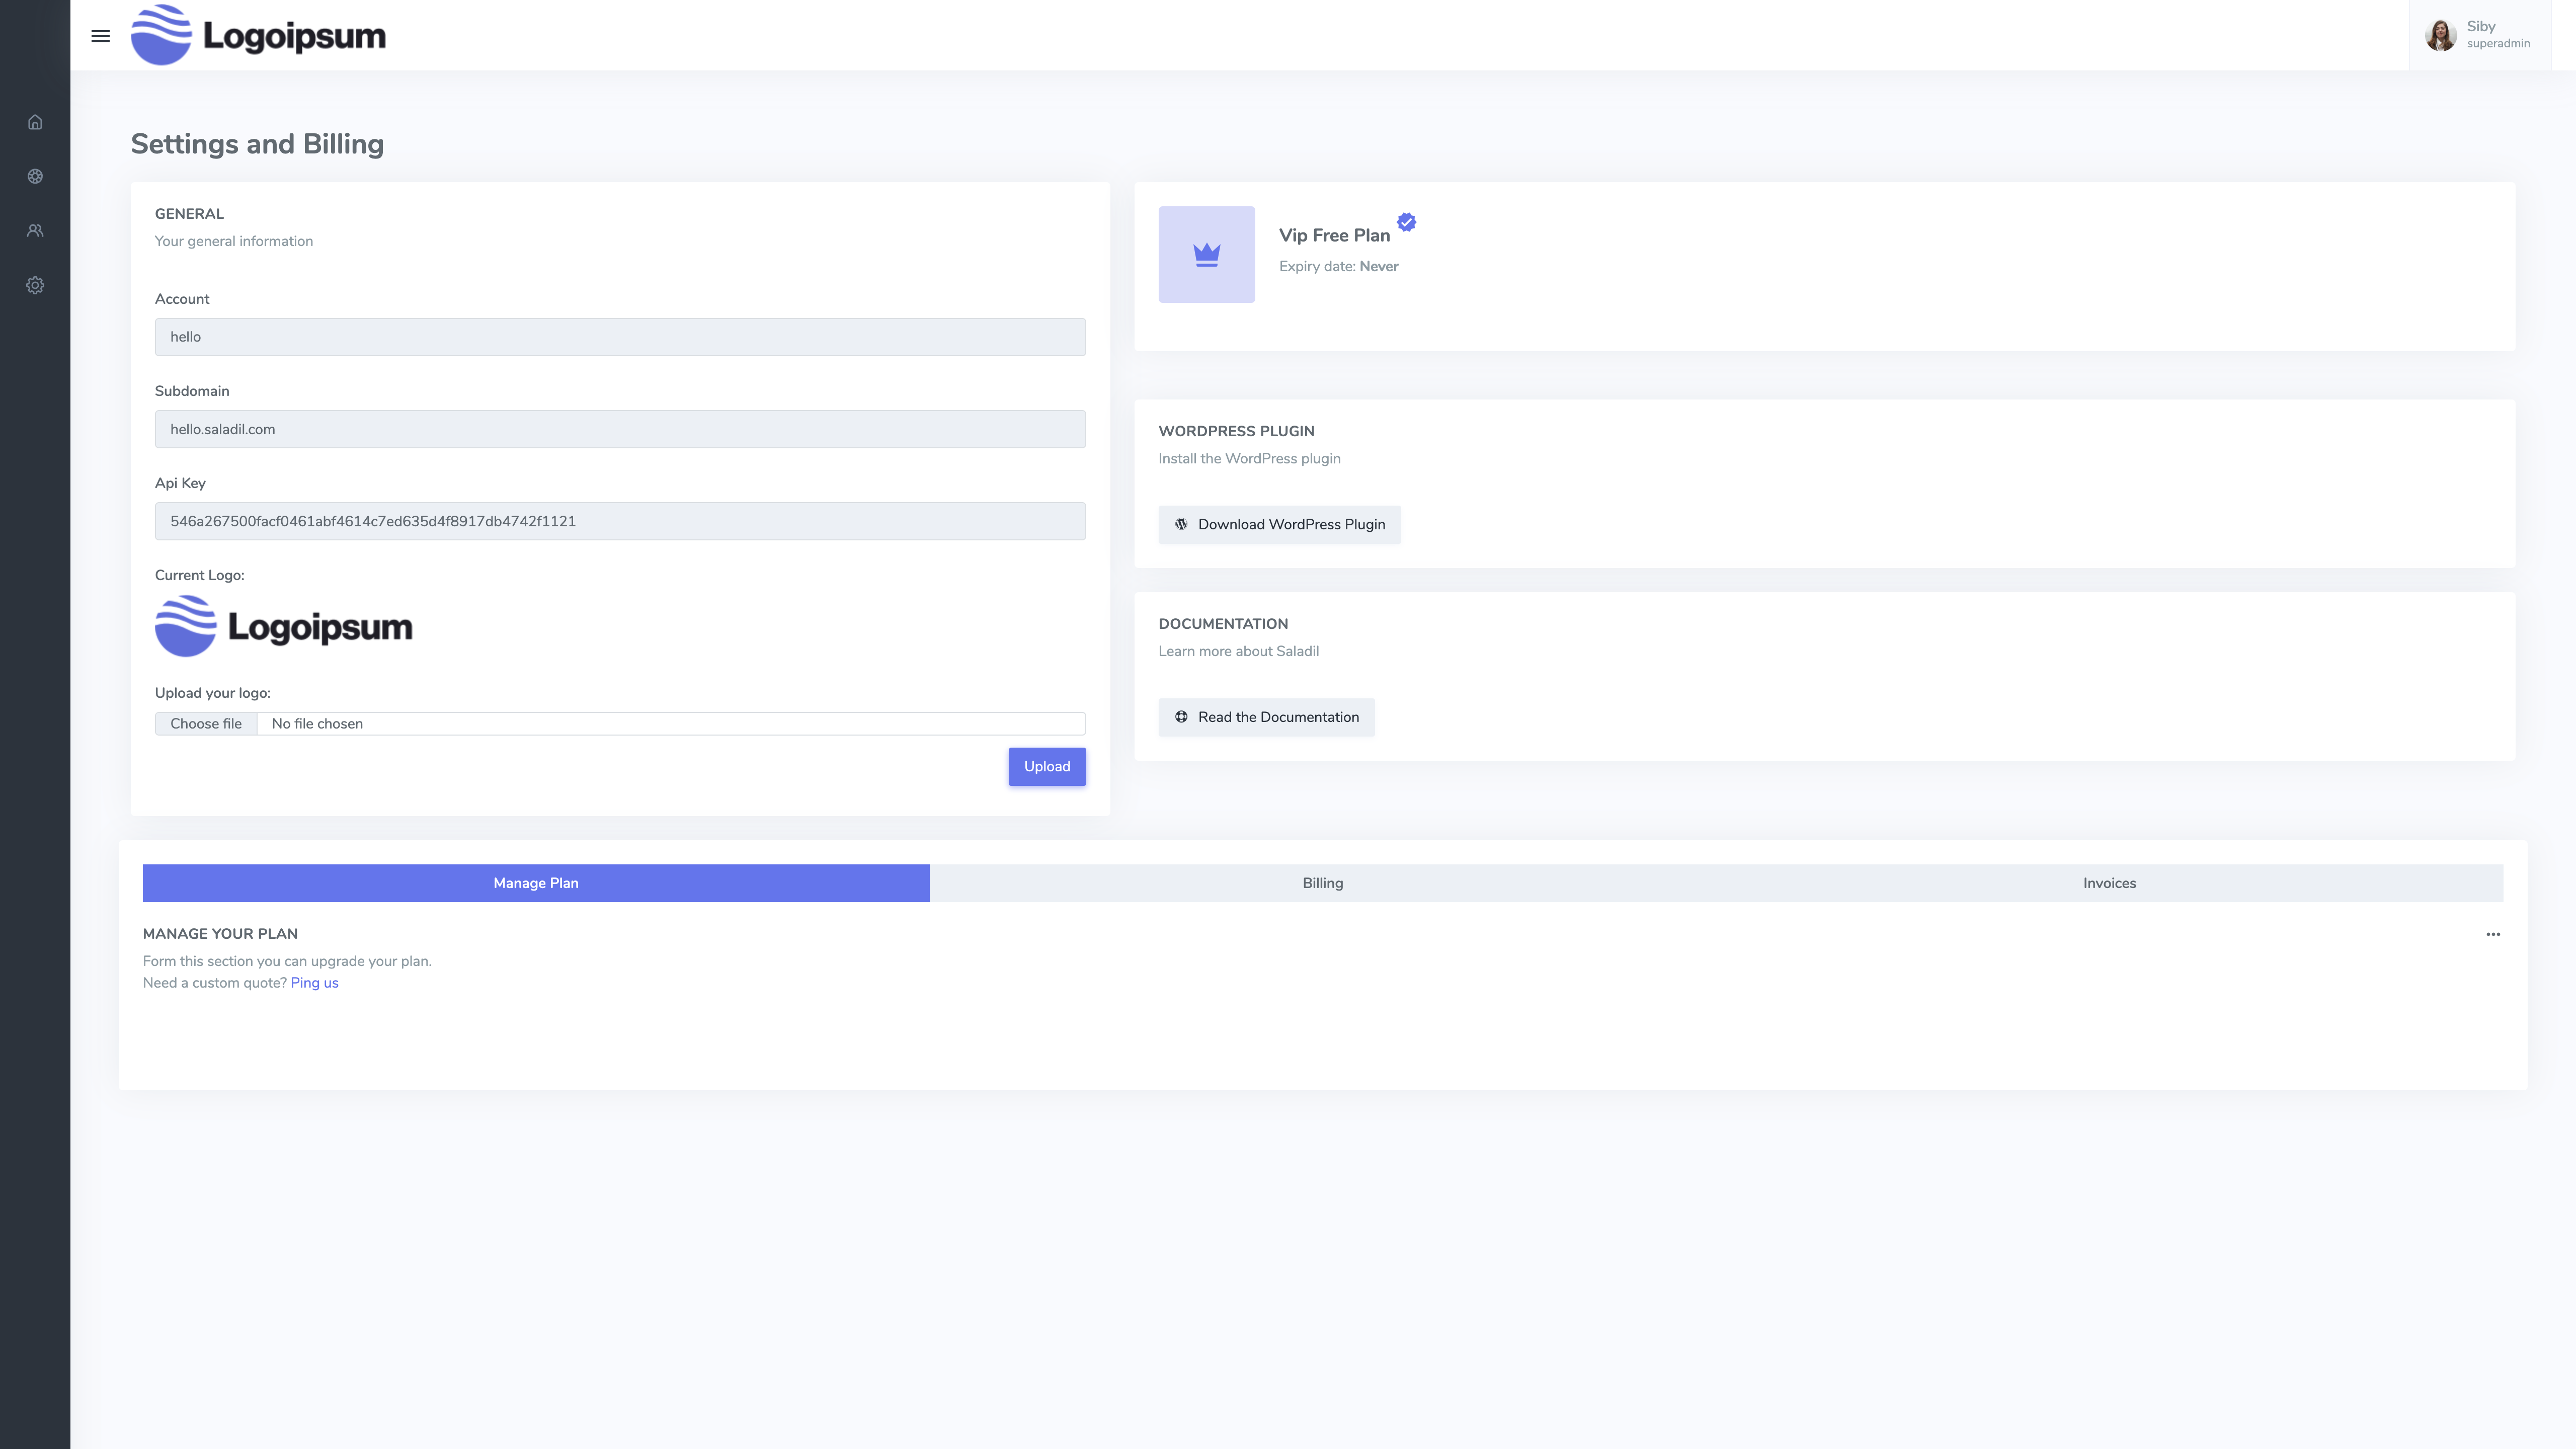
After logging in, in the top right hand side of the screen , click your avatar and go to "Settings and Billing".
After downloading the plugin, follow the classic installation procedure.
Once the plugin has been installed and activated, you need to enter the account and api key information provided during the creation of your saladil account.
To retrieve your account and your Api key please check this chapter.
Retrieve and insert your account and your Api key
as shown in the previous chapter. to connect your wordpress site to saladil and activate it, you must enter:
- Your account Name
- Your API key
You can easily find this data in your setting and billing page.
Check out this screenshot:
GETTING STARTED
2. Embed the Support Ticket form on your site
And start getting tickets from your site
Now we need to create the ticket page on your site. This page will be accessible only to your customers.
It means that the page will require a login, but saladil also offers a guest form ticket capability, to learn more please check this link.
Customers will be able to manage their tickets or send new ones.
Click on new page on your WordPress, and simple add this shortcode via Gutenberg or with any page builder:
[saladil_customer_area]Ok, now hit the publish button, and browse the page.
Depending on the theme you have installed, the page should look like this one:

Well done dude!
Aww yeah, you've successfully installed Saladil on your WordPress. Get ready to rock!

One Minute Installation
How to integrate Saladil on your WordPress site and receive your first ticket.

Configure Saladil
Setup the system to speed up the ticketing workflow


 Account & Billing